Friday, April 1, 2011
Father's Heart Quilt
Thursday, September 9, 2010
IQ: Carpenter's Squares
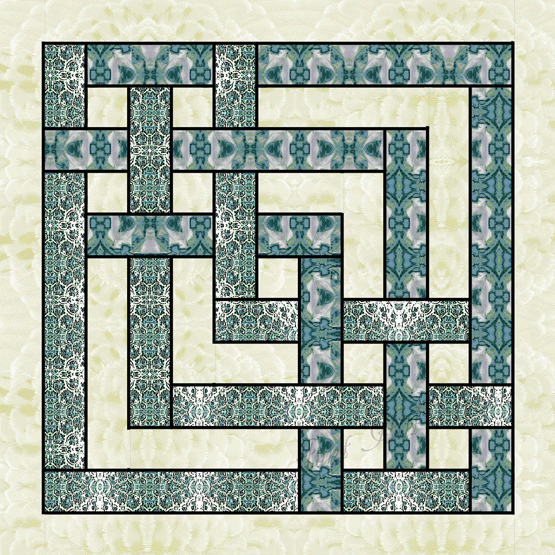
Harking back to traditions in early Gaelic Christianity, Celtic interlace represented the way in which all life is woven together. The interlace patterns represented in this design symbolize the idea that the afterlife (heaven) and this present world (earth) intersect creating a pattern that, at least for now, only God the Creator sees the whole of.The use of triple bands to create the interlace in this design also suggests the Trinity, a concept of the Father, Son, and Holy Spirit together as One.
Another use of religious symbolism is seen in the repetition of the four isolated background squares in each corner. This design feature suggests a relationship to the idea of the “foursquare gospel” (meaning a good foundation for one's faith), terminology borrowed from the Biblical book of Revelations. To make the quilt shown in this post I used a dark purple reproduction fabric from P&B for the background, with a Michael Miller Asian print and one of Northcott's Quilt for A Cure(TM) fabrics as the bands. Machine quilted in a random free-motion swirliness.
The combination of these fabrics, I think, is visually striking but also speaks to diversity -- reminding me that there are many different people with many different backgrounds, talents, and gifts who come together to make up the beauty of the body of believers.
Wednesday, June 30, 2010
Carpenter's Squares

~Carpenter's Squares Infant Quilt ~
From the class description:
The woven bands of the Carpenter’s Squares create a high graphic design with a modern, a classic, even a Celtic appeal which looks difficult to do, but really isn’t. Once you know the secret of creating consistent T-seams this infant quilt top becomes so simple, beginning quilters can confidently piece it. More experienced quilters will also find this quilt top an excellent opportunity to practice “pinless seaming” a speed construction technique using very few pins.The "sample quilt" made up to help advertise the class:
Tuesday, June 29, 2010
Outside the Lines
I started off quilting in straight lines. Two inches apart, respectably thorough but not too dense. Faster on a hot day. Simpler and faster on a project I want to finish quickly. But I got bored.
Like crop circles suddenly appearing in a field of neatly planted straight rows, freehand quilting curlicues suddenly erupted to decorate the last corner of the quilt. I suppose I should know better... never settle for boring rows when arabesques and scroll-work are an option.
Tuesday, June 22, 2010
Photo Shoot
Tuesday, April 13, 2010
Sing a Song of Sixpence
Counting House, the full-size quilt pattern got shrunk last week, into a mere Sixpence. That was the easy part. The new baby-size quilt design went together smoothly and I had a blast picking out the color pallet.
Then I decided to machine quilt in "bubbles" (aka "river rocks") a freehand machine quilting design that is.... well, it uses a lot of thread.
close up of freehand "bubbles" machine quilting
I had to make a run to the shop for more thread half way through.
Seven empty, brand-new spools of thread later it was done. Took me twice as long to quilt it as to piece it in the first place. But I do love the texture of a heavily quilted quilt.
The Nursery Rhyme
Sing a song of Sixpence, pocket full of rye
Four and twenty blackbirds baked into a pie,
When the pie was opened the birds began to sing.
Wasn't that a dainty dish to set before a king?
The king was in the Counting House, counting out his money.
The queen was in the parlor eating bread and honey.
The maid was in the garden hanging out the clothes,
When down came a blackbird and nipped off her nose.
The king called his doctor who sewed it on again
He sewed it on so neatly the seam could not be seen.
Sing a song of Sixpence pocket full of rye,
Four and twenty blackbirds baked into a pie.
Monday, February 22, 2010
Currently Quilting
For those who want to know: The dark spiky and thistle-y print is "Camelot" from Hoffman. The light print is a Maywood Studios "Beautiful Backgrounds" with pale green dragonflies and grasses dancing across it. And the stems and leaves of the appliqued thistles are done with a varigated Sulkey rayon thread.
Tuesday, November 10, 2009
Gettysburg Town Square
Today the town of Gettysburg sits, as it always has, on the intersection of several major highways, like a spider at the center of a web. In the summer of 1863, at the height of the Civil War, Confederate and Union soldiers caught in that web would find themselves fighting one of the bloodiest battles of history. In just three days the battle of Gettysburg resulted in over 46, 000 American casualties -- 7,863 dead and 27,224 wounded.Meant to relieve the battle-weary southern states and resupply Confederate soldiers with bounty from rich northern farms, General Lee’s northern campaign became the most decisive turning point of the Civil War. Nearly a third of Lee’s officers were killed, captured, or wounded. Abandoning the Pennsylvania Campaign, the South retreated and for the remainder of the war Lee planned no more strategic offensives into northern territory.
On July 1st 1863 the battle began. The two armies, led by General Lee (CSA) and General Meade (USA), collided in the low ridges to the northwest of town. Buying time until reinforcements could arrive, Union cavalry and infantry forces laid out defenses on Herr’s Ridge, McPherson’s Ridge, and Seminary Ridge. Stronger Confederate forces attacked from the north and west collapsing Union lines and sending the soldiers retreating to the hills south of Gettysburg, taking the battle along the web of roads through the town itself. This quilt square takes its inspiration from those historic streets. From the intersections of highway and history that make up the town of Gettysburg.
PIECEFUL SLUMBER PATTERNS NOW AVAILABLE THROUGH NEEDLE AND THREAD IN GETTYSBURG PA
Friday, May 15, 2009
Thief in the Night
Thursday, March 19, 2009
Red Winged Book Bird
An easy scrap quilt with a bonus. This is my Red-Winged Book Bird Quilt. Using all my leftover red fabrics and scraps, I made "book" blocks from five rectangles (2.5"x10.5" each) to make the 10 inch blocks and sashed my red books with a black batik. But I didn't stop there. Do you see? Down in the bottom right corner of the quilt is a red-winged blackbird.

Stuffed machine applique on the unfinished quilt top, this attempt at a red-wing blackbird crooning over a cattail was inspired by an old favorite PBS show Book Bird, and the fact that while I was making the blocks for this quilt I was listening to Where the Red-Winged Blackbirds Sing. It's completely obvious I drew my template from looking at the woodblock print cover art of Jim Schulz's CD.
Saturday, January 17, 2009
Creating Cardinals -- Quilt Templates
You can do this too. I'll walk you through it; it's not hard.
You need:
- Your template material -- I used card stock but you could use anything from Mylar to copy paper to basswood.
- A pen or some sort of marking implement that works with your template material.
- A pair of scissors or something to cut your template out with.
- Straight edged ruler (I mostly used my rotary cutting ruler).
- Something round -- I used a water bottle here, but I've also used the jar lid of a scented candle, a bowl, and a canister of hand salve. Anything round will work as long as it's the right size to be the body of the bird.

Trace your round thing in the center of your paper.
Line the ruler up on the side that will become the bird's back and draw a straight line. I take advantage of the 45 degree angle on the corner of the ruler to get the feel of the peak of the birds head. This helps me estimate the height of the head and get the length of the line correct. You will need to draw another line from what becomes the chest of the bird to the tip of the head -- Cardinals don't have 45 degree heads.
Another line from the bottom of the bird out, helps to define the dimensions of the tail (in this case a downward tail) and then you can smooth out the shape of the bird.
Add a beak (and an eye just for looks) and cut out your template.
All that remains is to trace the template onto the fabric and applique your bird onto a quilt square. I keep the beak on the main template so that it doesn't get lost ( it's such a small piece) but you will use a different fabric and cut the beak separately when making it up.
Remember when cutting out your fabric, if you are doing needle turn applique you will need to add a seam allowance. If you are doing raw edge applique you can cut out on the lines you trace around your template.
You can also create an upward facing tail on the template as shown in the photo below. Simply add a rectangle at the lower end of the line that makes the back of the bird, and shift the bottom line to connect.
This tufted-head bird template done in reds will be Cardinals, and since my For the Birds sampler has been in reds, browns, and golds I have been calling it a Cardinal. However, there are other birds with similar head shapes, the Tufted Titmouse, Woodpeckers, Quail, and Blue Jays. Blue Jays would be an excellent choice for a sampler done in shades of blue.
Thursday, January 15, 2009
Make Your Block Bigger
I decided it was too small, for my purposes I wanted it to be a little bigger, about 10 inches or so for the finished size. The easiest way to make a block larger without remaking it with larger pieces is to frame it.
To frame my block I took my dark fabric from this block and cut 1.5 x 9.5 inch strips. I added another light fabric for the 1.5 inch squares.
I sewed in rows:
new square, new strip, new square
new strip, "old" block, new strip
new square, new strip, new square
and then I sewed those rows together in that order.

This process works with any sized block. If you had a 5 inch (finished -- unfinished measure would be 5.5) block that you wanted to turn into a 7 inch (finished) block you would use strips that were 2.5 x5.5 inches and 2.5 inch squares in the corners. You could add 3 inch strips and squares to a 15 inch block (allowing for seams) and get an 18 inch block. and if you ever feel you've added too much and you want to chop it back down to a smaller size -- rotary cutters and see-through rulers are great for that.
More For the Birds blocks and tutorials can be found by following the cardinal photo link in the sidebar.
Saturday, January 3, 2009
Pieces of Paper: Faux Fabric
Solution -- Photocopy it.
Once I have my faux fabric I can cut up the paper and play with the positions and options. For example... If I wanted to see how this fabric looks as the King's Cross (aka Tennessee Crossroads) Block:
I like the look of the top two quadrants in that one above. And I like the top left (see below) when I switch it to the lighter orange for the background....
Although this option with the blue looks good too.Monday, October 27, 2008
Blue and Green and Gold
That fabric across the top has a great colour combo, with sage/olive green stems and mustard gold flowers framed in creamy tan, against a rich blue ground. As you can see, I've pulled out several greens and a gold to match, and added a blue and green "eyeball" stripe, a blue and gold on tan print and a fun blue and green on tan print that reminds me of peapods (on the far right).These will blend together in a simple scrappy squares quilt -- accomplishing two purposes at once.
- Test the yardage/measurements/math on another quilt kit pattern.
- Make a quilt for my sister. She loves the simpler designs and when she saw the one I was drafting she casually mentioned how good it would look with little tufts (tied), which is her way of hinting that she wants me to make one for her.
Sunday, October 26, 2008
Color Theory and Balance
The asymmetry of the photo still holds appeal because the large dark tree is echoed by the smaller dark tree and the light leaves are anchored by dark trunks. When making a modern quilt remember that interspersing your color values in a balanced way will give you a harmonious whole.Friday, October 24, 2008
Peek at the Projects
One of the designs I've created for the kits I'm calling Counting House. It uses blocks of various quilting "coins" an idea inspired by the nursery rhyme phrase "The King was in the counting house, counting out his money..."As the quilts are meant to be easy (or beginner) the most complicated blocks in the whole thing are the Coin of the Orient block -- shown above. As you can see I'm using a pallet of red and green and white for the sample I'm doing up.
Saturday, October 18, 2008
For the Five People Wondering If I Went Away Again
I will share one of the things that's been keeping me so busy:
Those quilt tops I was asked to design -- they're to be original patterns for kits (for a local fabric store) and they need to take exactly six yards to make a full sized quilt top. Using 1 yard each from 6 different fabrics. So, I'm in math mode. Yardages, seam allowances, cutting sizes and finished sizes, selvage edges, math, math, math... my words want to come out in inches and decimal points.
Would you like a sneak peek at one of the designs I'm working on?
I'm working on a scrappy-style quilt top 70" x 80" called Thief in the Night.
Here is a section of it, in grayscale.
My computer graphic design skills leave something to be desired, but once I have the pattern roughed-out and calculated I can do up a sample from fabrics. I'd rather fiddle with pixels than cut into my fabric stash with no good reason.So that's the stage I'm at now. I have three patterns drafted, calculated, and computer "sketched" so Monday I'll begin cutting and sewing the samples.
Wednesday, October 15, 2008
My Favorite Quilt Book
Thursday, September 11, 2008
Gathering Thoughts and Fabrics
From my box (er, boxes) of leftover fabrics I pulled out a collection of autumn colors. Quite a few of these pieces are the remains of fat quarters used in other projects; but I did mix in a couple half yard pieces that have been languishing in my stash (they had come home to use in other quilts and were rejected). The roll on the right side of the picture are bias strips -- I experimented with a bias-cut apron pattern, it didn't quite turn out right but the mistakes cut up into strips that will be perfect for binding.How many leftovers do you have? Don't be afraid to combine leftovers from one project with leftovers from another. All these leftovers blend well together and will make a lovely scrappy quilt.
Since I promised several blocks measuring 9 inches (9.5" unfinished) let's make it a scrappy sampler quilt. A very Autumnal Scrappy Sampler Quilt. Leaves and trees? No, there's not really enough variety in the blocks. Birds perhaps? Hmmm... the geese flocking, the birds headed south, that's a very autumn thing. Plus, one of my scraps has feathers on it -- perfect.
Here are my sketches for the sampler (click on the photo to enlarge). According to my reference books, all of these blocks have names -- granted some are alternate names -- that relate to birds and flying.
Do you know which ones are which? See if you can match these block names to the block sketches. In random order they are:Flying Bird
Wild Goose Chase
Crow's Foot
Geese in Flight
Ducks and Ducklings
Birds in the Air
Quail's Nest
Goose Tracks
Flying Crow
Winged Square
Friday, September 5, 2008
Starter Quilt Simple Project: Step Four
In step two we cut some pieces that we didn't use in step three; we'll use those now.
Put together four strips as follows:
a 15.5 inch (by3.5 inch) striped (fabric A) bar
then a 3.5 inch square of fabric E
a 3.5 inch square of fabric C
another 3.5" square of E
and second 15.5" x 3.5" bar of your stripe (A)
Two of those can be pinned and sewn onto the top now (remember to nestle your seams whenever possible and press accordingly). The other two will get a 3.5 inch square of fabric B sewn on each end.
And then they'll get sewn on.
And there's our 45 inch square baby quilt.
Remember that Michael Miller yellow stripe I used to demonstrate how to cut your stripes in step two? Well, I used it to make a very similar project. Same 3.5" squares, and width on our stripes, the finished top still measures 45"square and the layout is basically the same.
What changed? Our 9.5 inch blocks became "snowball" blocks, and instead of solid 3.5 inch squares in the border I opted for half square triangles. Oh, and in case you missed this, I didn't use the same fabric. ;-)
I'll demonstrate half square triangles in the next Building Blocks, and snowballs later. Then we'll take a look at battings (aka wadding) and super easy finishing techniques. For those of you interested in something a little more complicated I'm also planning some different 9.5 inch blocks that we can insert into this layout, and when we get to finishing that "sampler quilt" I'll be looking at hand quilting patterns and methods.
Sound's like we're going to be busy for quite a while.